6. Core Features and Functionalities
Each feature explained below is designed to make SmartOfficeNXT a robust and user-friendly workflow automation platform. You'll find a brief description, usage steps, and tips where applicable.
6.1 Form Designer
Description: Create customizable forms using a no-code drag-and-drop designer. Add fields, tabs, validation, permissions, and logic to fit your business needs.
Step-by-step usage:
- Go to Create Form in the sidebar.
- Add fields, configure visibility and data types to design new form based on the requirement.
- Add advanced sections/tabs for better structure.
- Save and Publish.
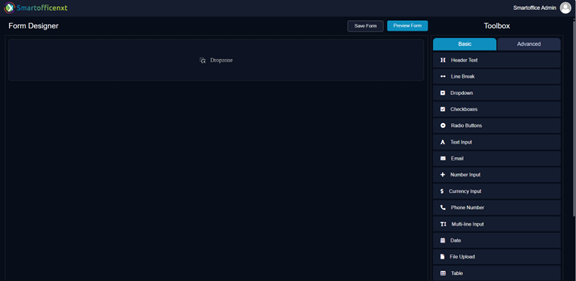
Form Designer – drag-and-drop interface for creating a new form.
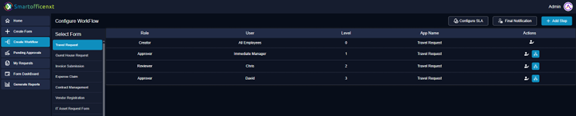
6.2 Configurable Workflows with Condition-Based Logic
Description: Create dynamic workflows for forms with condition-based routing. Assign stages to users, teams, or roles.
Step-by-step usage:
- Click Create Workflow for any form.
- Add workflow stages (creator, reviewer, approver).
- Define routing conditions based on form fields.
- Add SLA settings and configure notifications.
- Save the workflow.
Tips & Notes:
- Reuse workflows across forms where applicable.
Workflow Builder – adding stages and defining conditions.
6.3 Domain-Based Data Security
Description: Forms and workflows are securely restricted to users from the same domain (e.g., CompanyA.com vs CompanyB.com), ensuring data isolation and confidentiality in a multi-tenant SaaS environment.
Usage:
- The system automatically identifies the user's domain based on their login email ID.
- Users can only view, access, and act on forms and data associated with their domain.
- No manual domain configuration is required by the admin.
Tips & Notes:
- Enables secure multi-tenancy without admin overhead.
- Ensures that data visibility and access remain isolated and compliant with organizational boundaries.
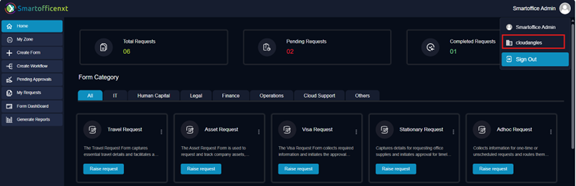
The top-right corner highlights the domain of the logged-in user.
6.4 Internal Communication Channel
Description: A built-in chat interface is available for each request, allowing users to communicate and collaborate in real time without switching to external platforms like email or Teams.
Usage:
- Open a request from the dashboard or My Requests section.
- Navigate to the Communication Channel tab within the request.
- Chat with stakeholders involved in the process.
- Mention users, attach files, and maintain context-aware discussions.
Tips & Notes:
- All chats are recorded within the request for audit and traceability.
- Ideal for streamlining decision-making and reducing external communication dependency.
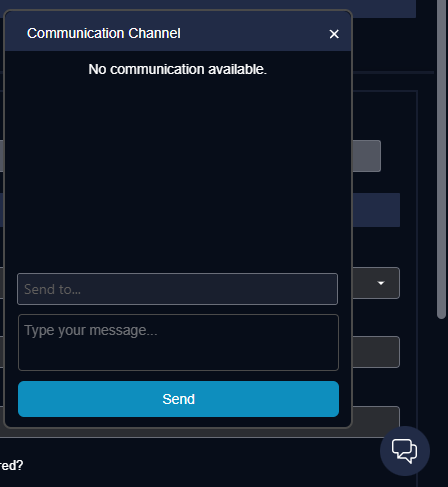
Internal Communication Channel
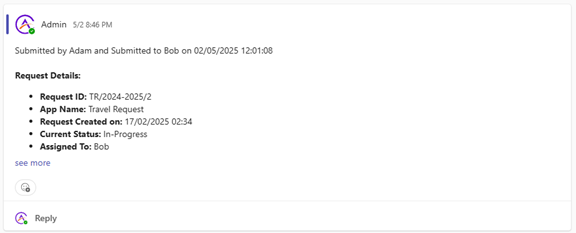
6.5 Email Notifications
Description: Automated emails are triggered at different workflow events like request creation, approval, rejection, or SLA breaches.
Usage:
- Configure email templates under Workflow Notifications.
- Emails will be sent to participants at each stage/updates.

Email Notifications for Updates
6.6 Graphical Workflow Representation
Description: Displays each form's workflow as a flowchart. Helps users understand the approval path and next stages.
Usage:
- Click on Workflow Preview in any form.
- View the process stages in graphical format.
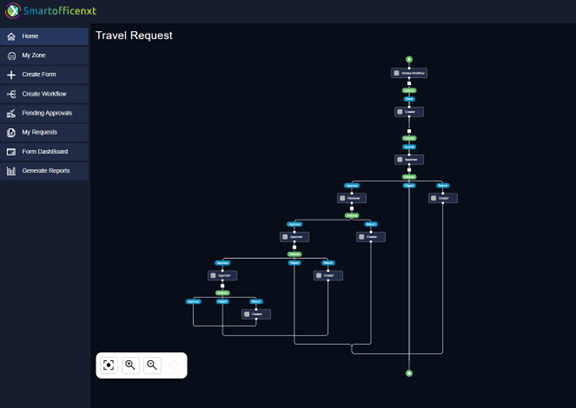
Graphical Workflow Representation
6.7 Teams Channel Integration
Description: Integrate SmartOfficeNXT with Microsoft Teams to receive workflow alerts.
Usage:
- Users get alerts in Teams and can approve/reject inside the Teams channel.
Teams Notifications
6.8 Export to Excel
Description: Download reports and form responses in Excel format for offline analysis or audits.
Usage:
- Go to Generate Reports.
- Apply filters.
- Click Export to Excel.
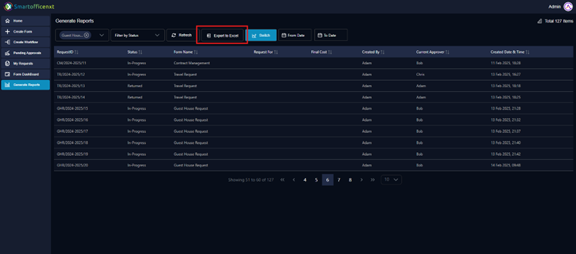
Download Filtered Excel Reports
6.9 Timesheet Control
Description: SmartOfficeNXT provides a configurable Timesheet Control within the Form Designer. This allows users to embed timesheet tracking into any form based on business requirements, rather than being limited to a standalone timesheet form.
Usage:
- While designing a form, drag and drop the Timesheet Control into the layout.
- Configure the control to capture task details, work hours, or other required fields.
- Publish the form to make the timesheet feature available to end-users.
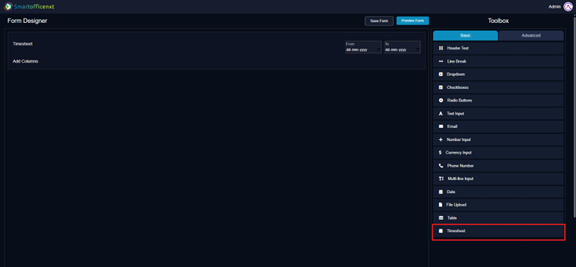
Timesheet Control - Highlighted bottom right.
Timesheet Data Export:
- Timesheet entries are linked to the form where the control was added.
- Data export can be performed from the respective form’s dashboard.
- Apply filters as needed, then download the data for reporting or audits.
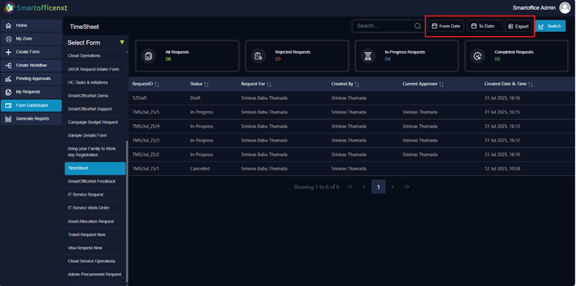
Timesheet - Data export available in the Timesheet Dashboard.
6.10 SLA Configuration
Description: Define response times per workflow stage. SLAs trigger alerts and highlight delays.
Usage:
- In workflow design, set SLA time for each form.
- Configure escalation actions or notifications on SLA breach.

SLA Configuration

Configure SLA
6.11 Reusable Existing Workflows
Description: Save time by cloning or assigning already created workflows to new forms.
Usage:
- After selecting a created form in Configure Workflow, if no workflow exists, the system prompts the user to choose an existing template if required.
- Choose a workflow and link it to the new form.
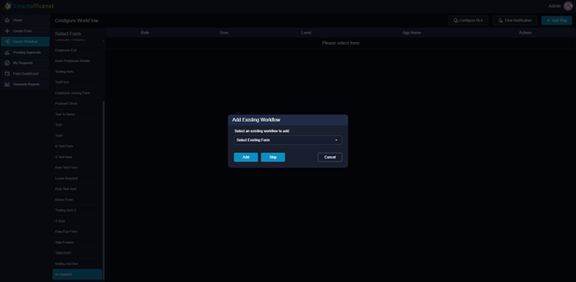
Reusable Existing Workflows